


Re-Examination - D3 and D4
Re-Examination - D3&D4.
There is an obvious problem when always adopting the tactic of lobbing from either the D3 or D4 zones (the videos below do not focus on the correct T positioning).
If the player always lobs from the front, although returning to The T, the opponent can wait at the back and respond with a boast or drop shot.
If the opponent always responds with a short shot , eventually, the player will be fatigued.
Therefore, the player should intermittently play a straight drop for deception as a substitute for the lob. For example, when the player is in either the D3 Zone or the D4 Zone.
The Pros of dropping (with reasonable quality) from the D3 and D4 defensive zones.
Because the player intermittently plays a drop as a substitute for a lob, the opponent should wait Near The Front Of The T and not anticipate just the drop. This increases the player's prospect of attaining Near The Front Of The T
This tactical form of deception further increases the player's prospect of returning to The Back Of The T when the player lobs.
The Cons of dropping (with reasonable quality) from the D3 and D4 defensive zones.
Unfortunately, the player when straight dropping to create time to attain Near The Front Of The T may require more than reasonable quality. Thus, it is imperative that the drop is used only intermittently not only for deception but also for defensive reasons.
Furthermore, after playing the drop the player has less time to react to the opponent's return.
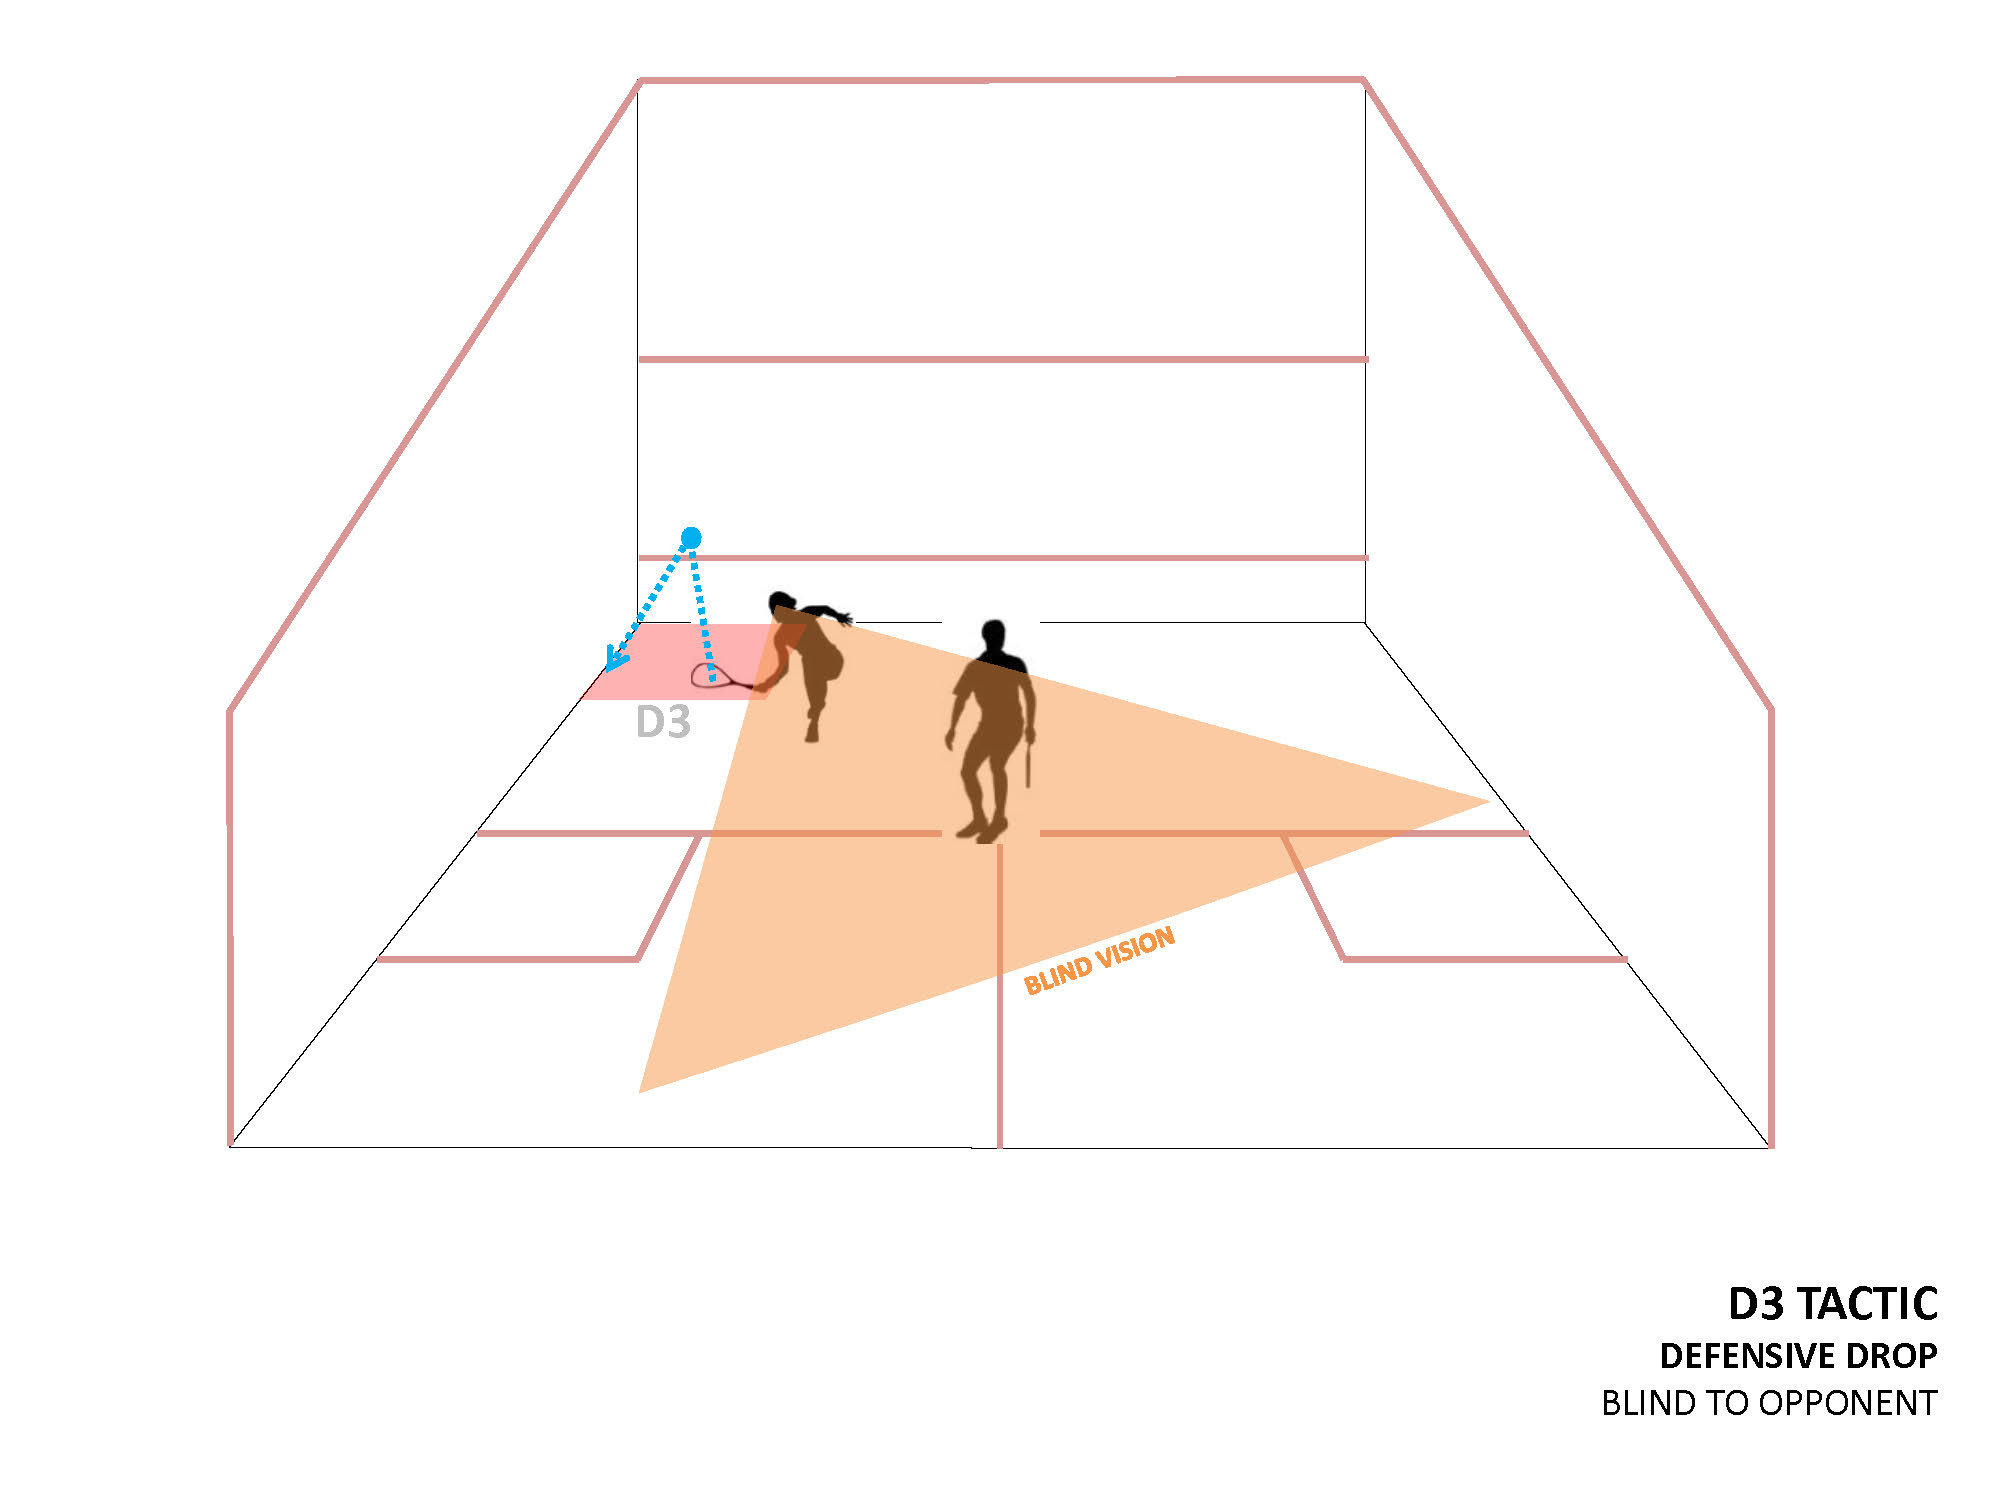
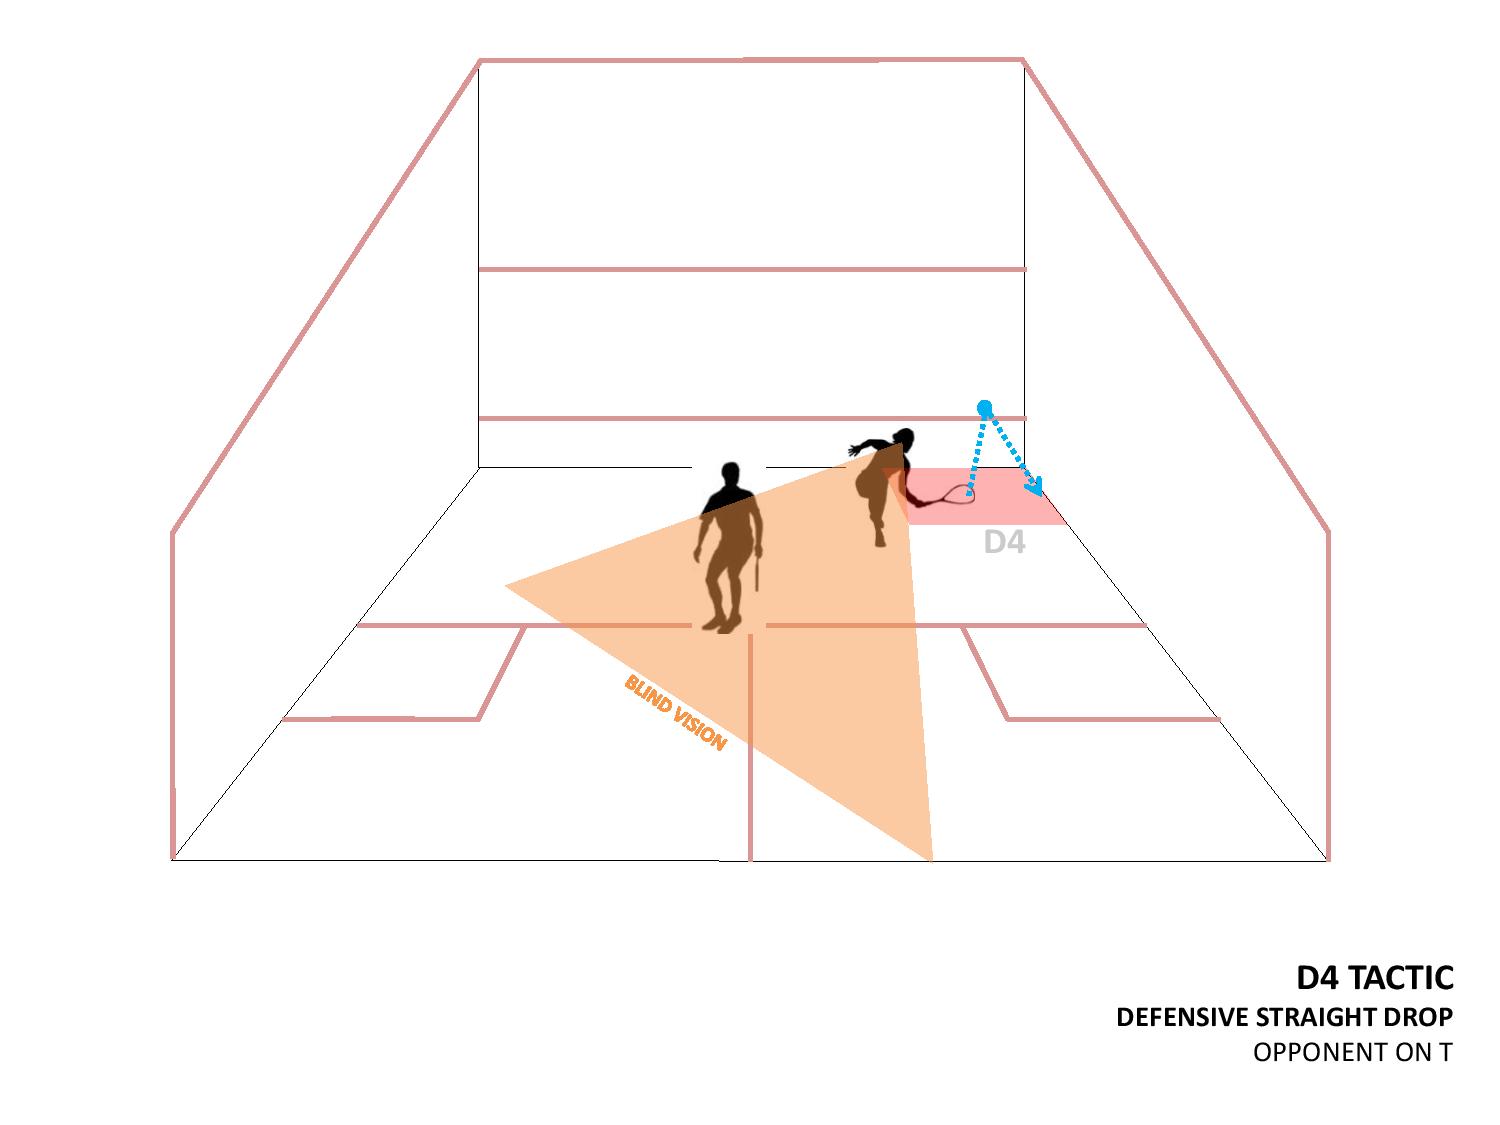
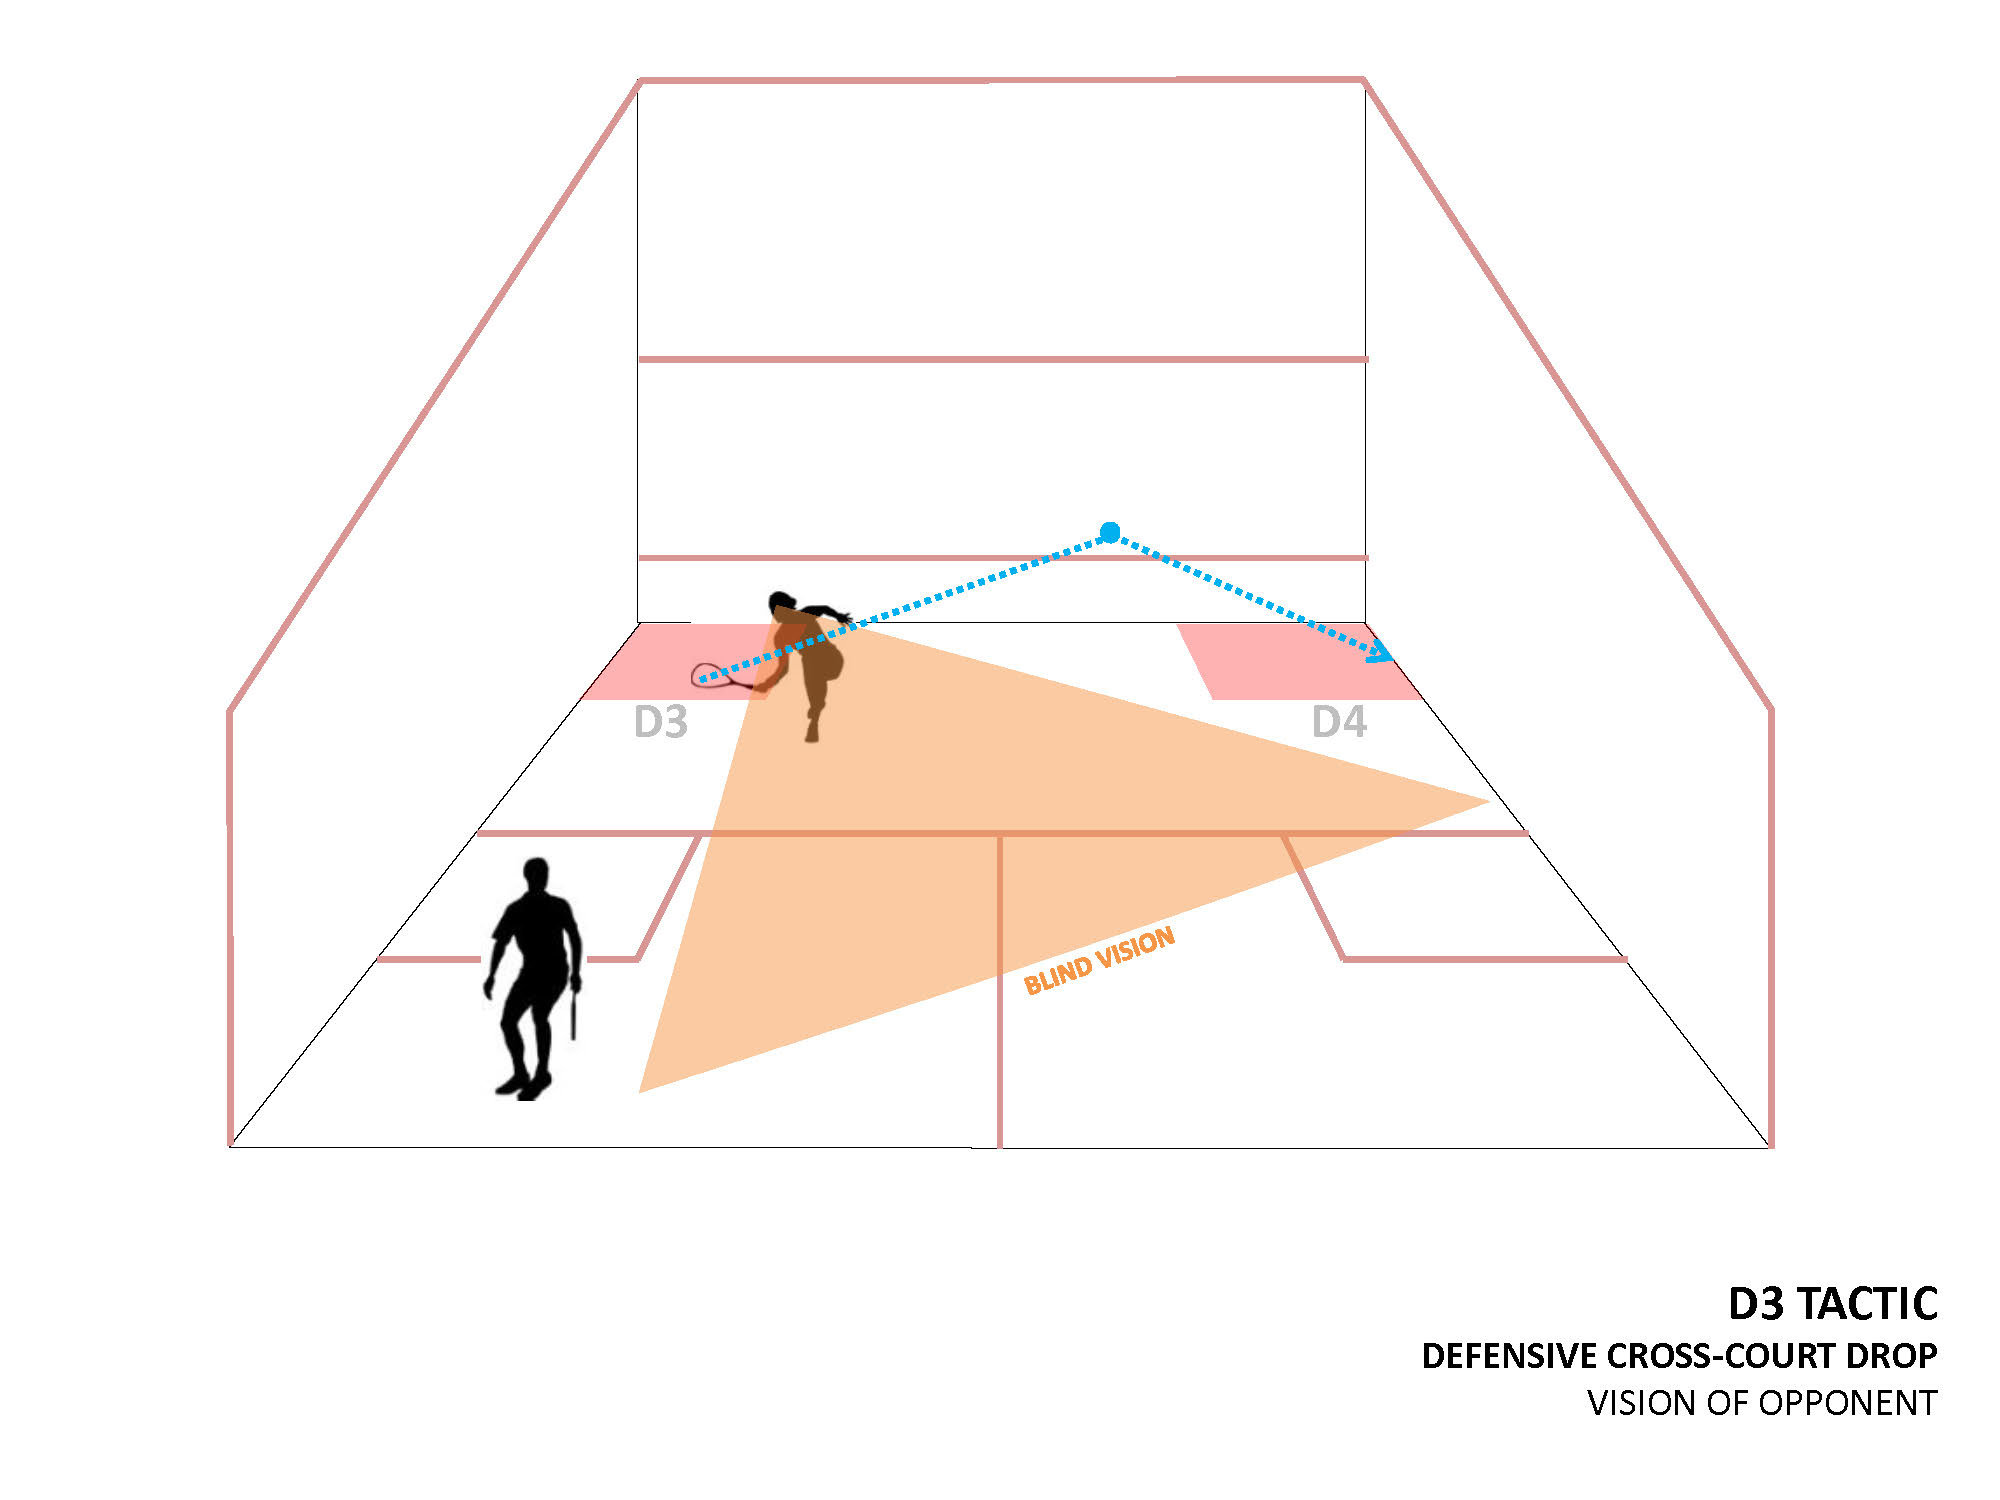
As previously stated the zones are defensive because of the player's proximity in relation to The T and because the player is blind to the opponent.
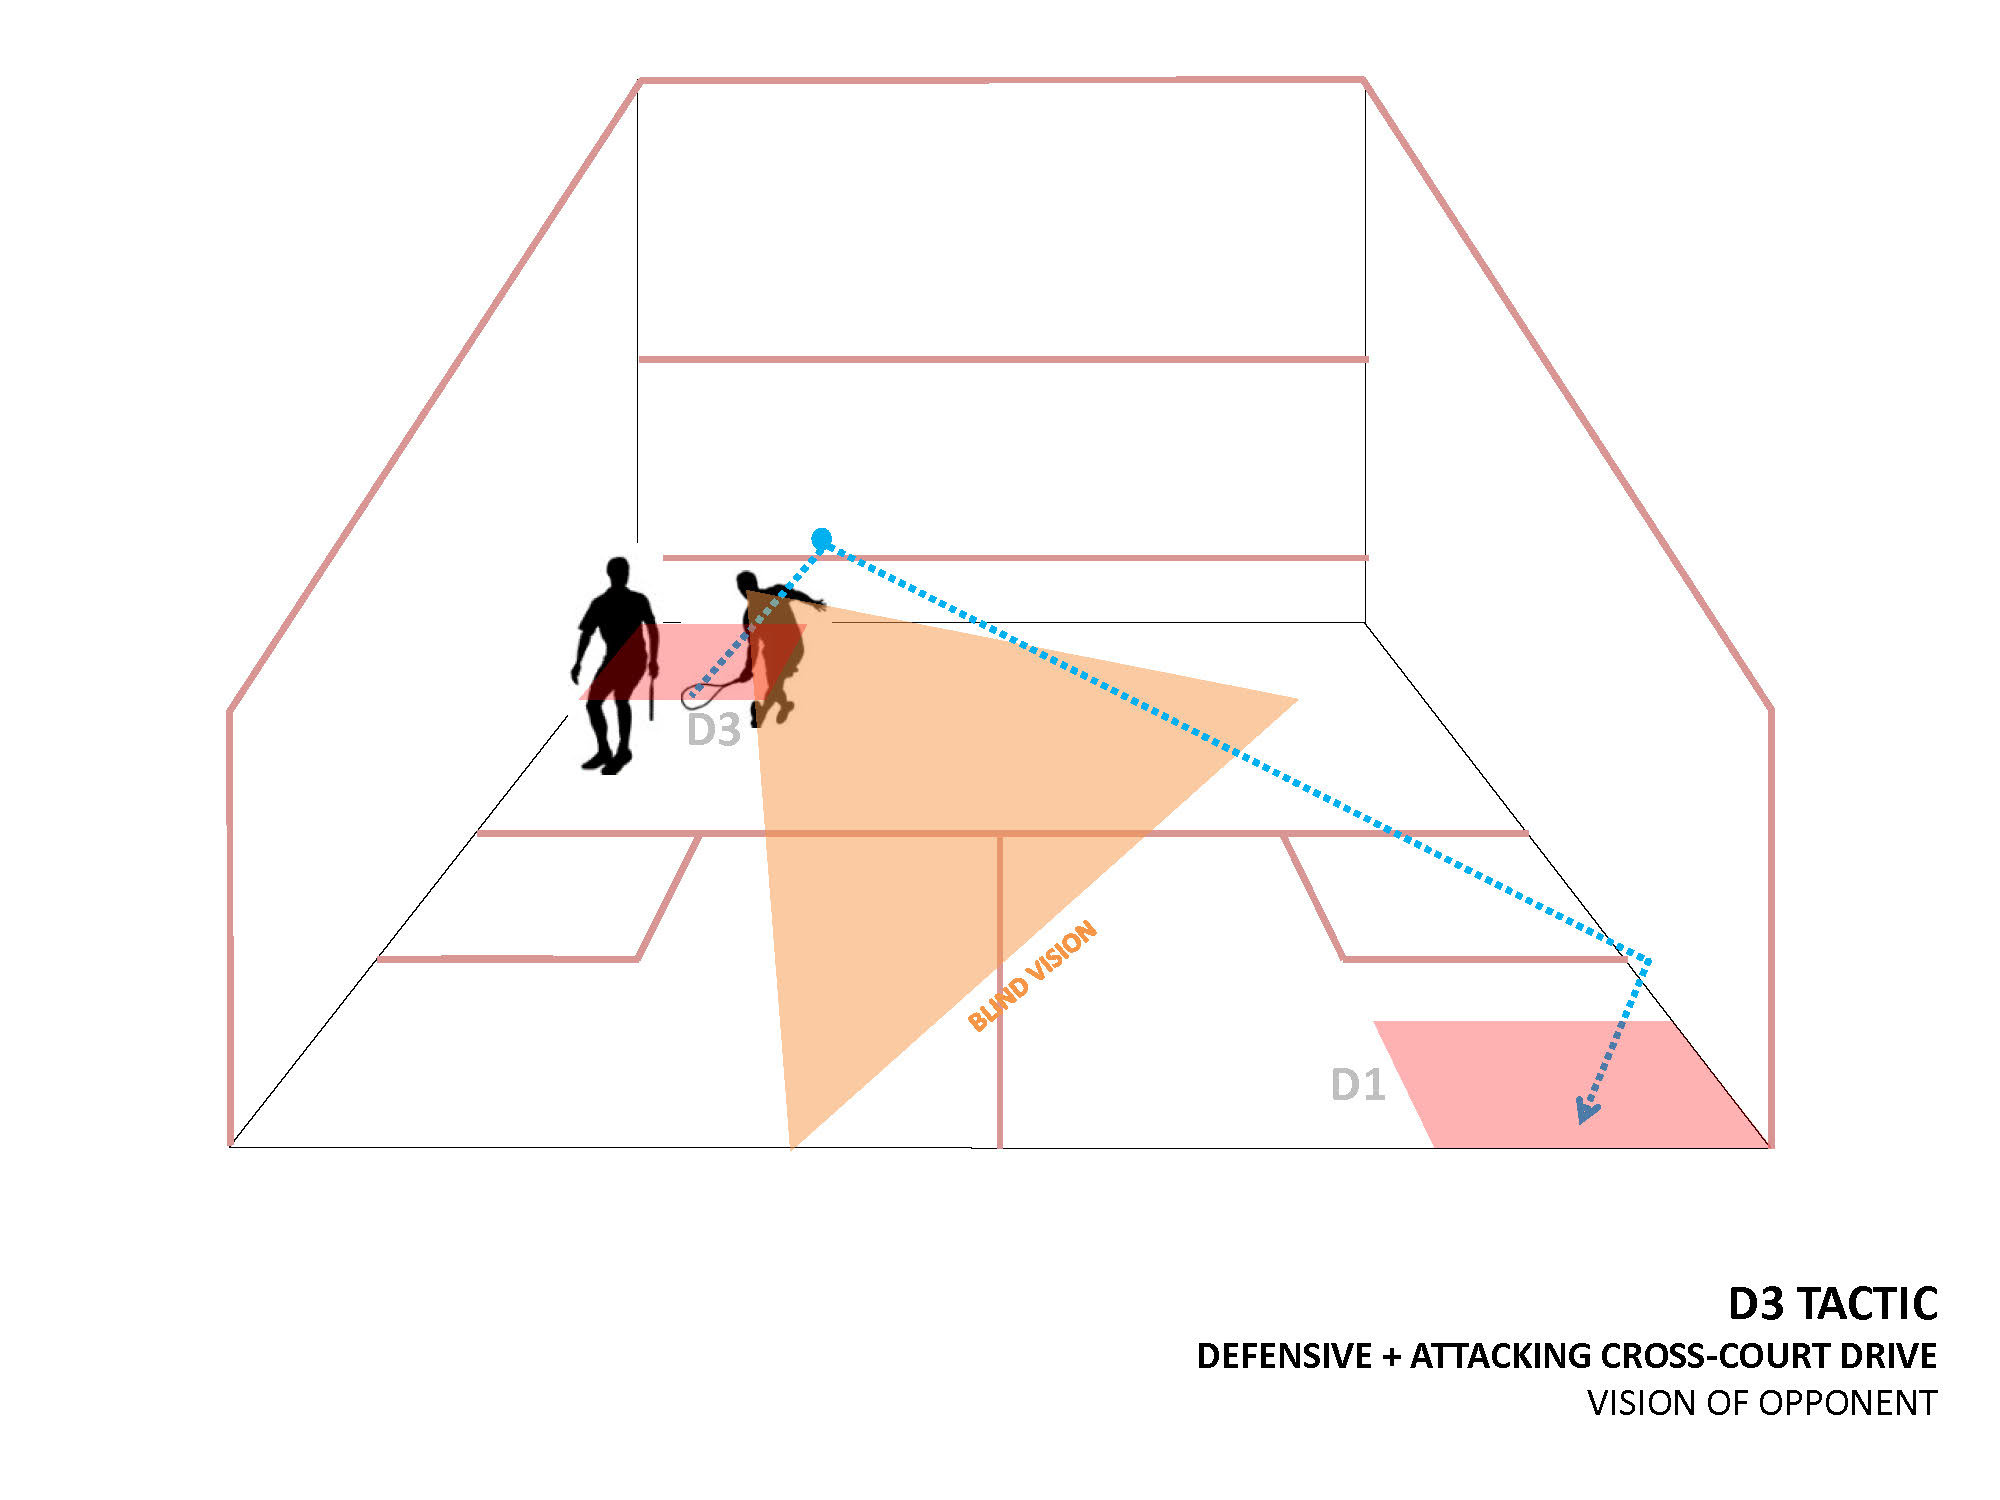
The back defensive zones do not present opportunities to see the opponent, however, the front defensive zones do. That is, the player may not be blind to the opponent.
When the player is in the front defensive zones and is not blind to the opponent, the player should adopt the natural attacking tactic of hitting the ball with pace to the furtherest point.
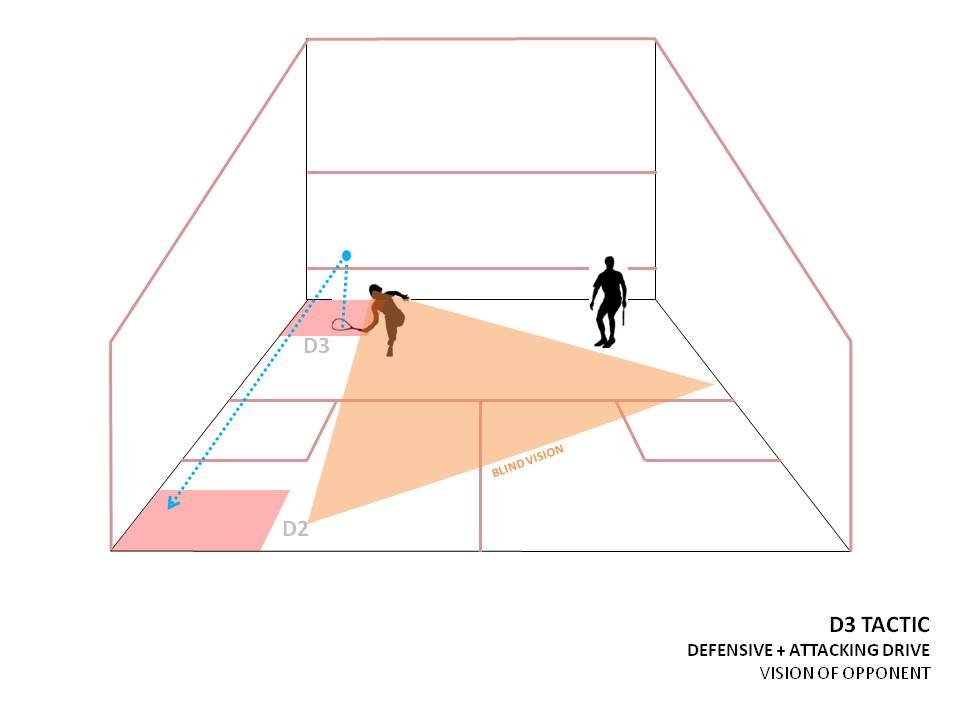
For example, when the player is in the D3 Zone the player attacks with a straight drive for defensive reasons.
For example, when the player is in the D3 Zone the player attacks with a cross-court drop for defensive reasons.
For example, when the player is in the D3 Zone the player attacks with a cross-court drive for defensive reasons.
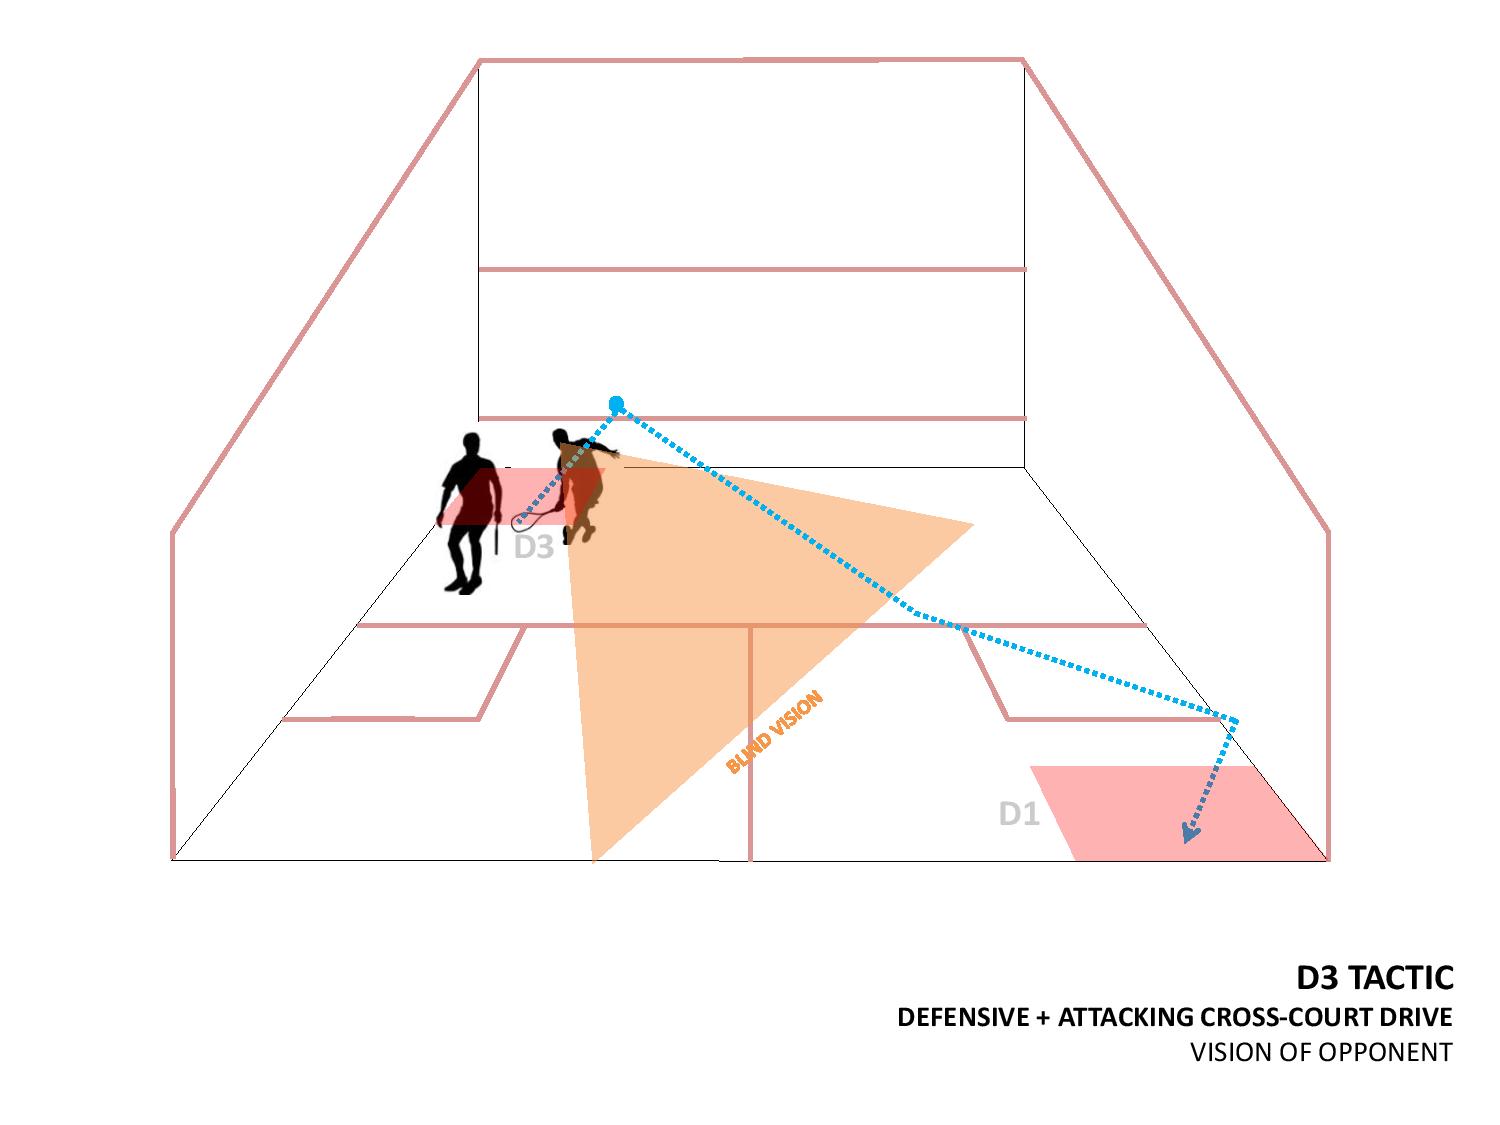
Generally, a cross court drive which bounces to the back wall will force the opponent back.
However, a cross-court drive which hits the side wall on the volley is more effective.
 The pros and cons of attacking from the front defensive zones when the opponent is not Near The Front Of The T.
The pros.
If the player attacks instead of defending when the opponent is not Near The Front Of The T, the player works the opponent from the front of the court to the back.
The player attains The T.
The cons.
The player may make an unforced error.
The player when hitting the ball with less than reasonable may not attain The T.
Copyright South Australia Squash Academy Michael Nash All Rights Reserved