


The A1 Attacking Zone
Introduction
Sequencing (Sequentially)
When teaching strategy the author uses the tool Sequencing by sequentially presenting "My Strategy".
Perspective
Firstly, the author believes that attaining The T Area by the time your opponent is about to hit the ball is critical and essential that it only requires reasonable quality. That is, the player does not have to rely on the player's A Game, but the player's B Game will suffice.
Rationale
The player's distance travelled to retrieve the ball is minimised if the player can be within The T Area by the time the opponent is about to hit the ball. Furthermore, the player only needs to hit the ball with reasonable quality.
Goal
To attain The T Area by the time your opponent is about to hit the ball and only require reasonable quality.
Process
The process which achieves the goal of attaining The T by the time the opponent is about to hit the ball is outlined below. This process, except for one scenario, only requires reasonable quality.
The process requires structure and with structure comes predictability. The player needs to learn to embrace the positive aspects of predictability and be aware of the negative.
The author decided that to assist the player to choose whether to attack or defend when attempting to attain The T the player needed to zone the court into defensive and attacking zones. The tool Visualisation is essential in this process.
Introduction Attacking Zone - A1
The player must zone the court into The Attacking Zone.
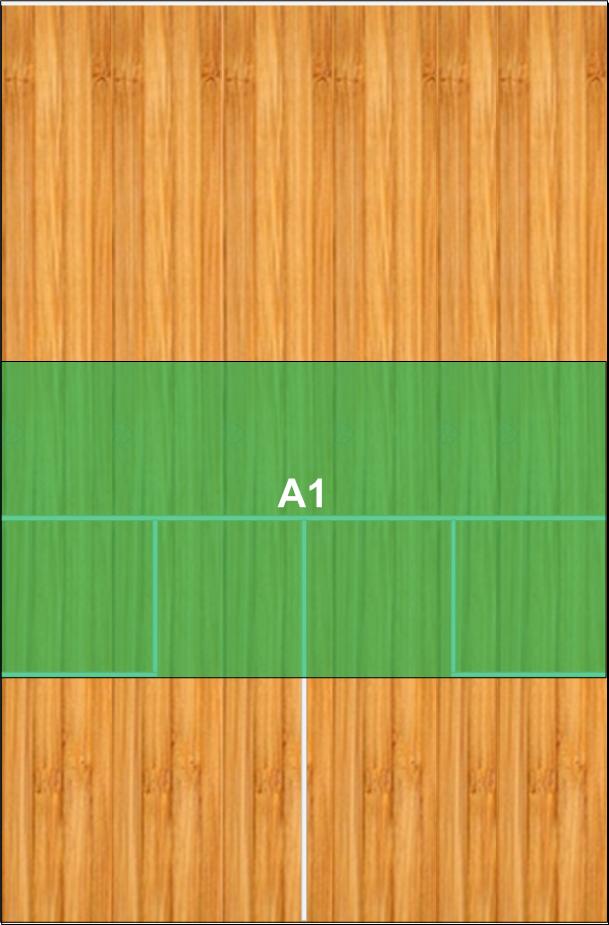
The A1 Zone is Attacking because of it's proximity in relation to The T.
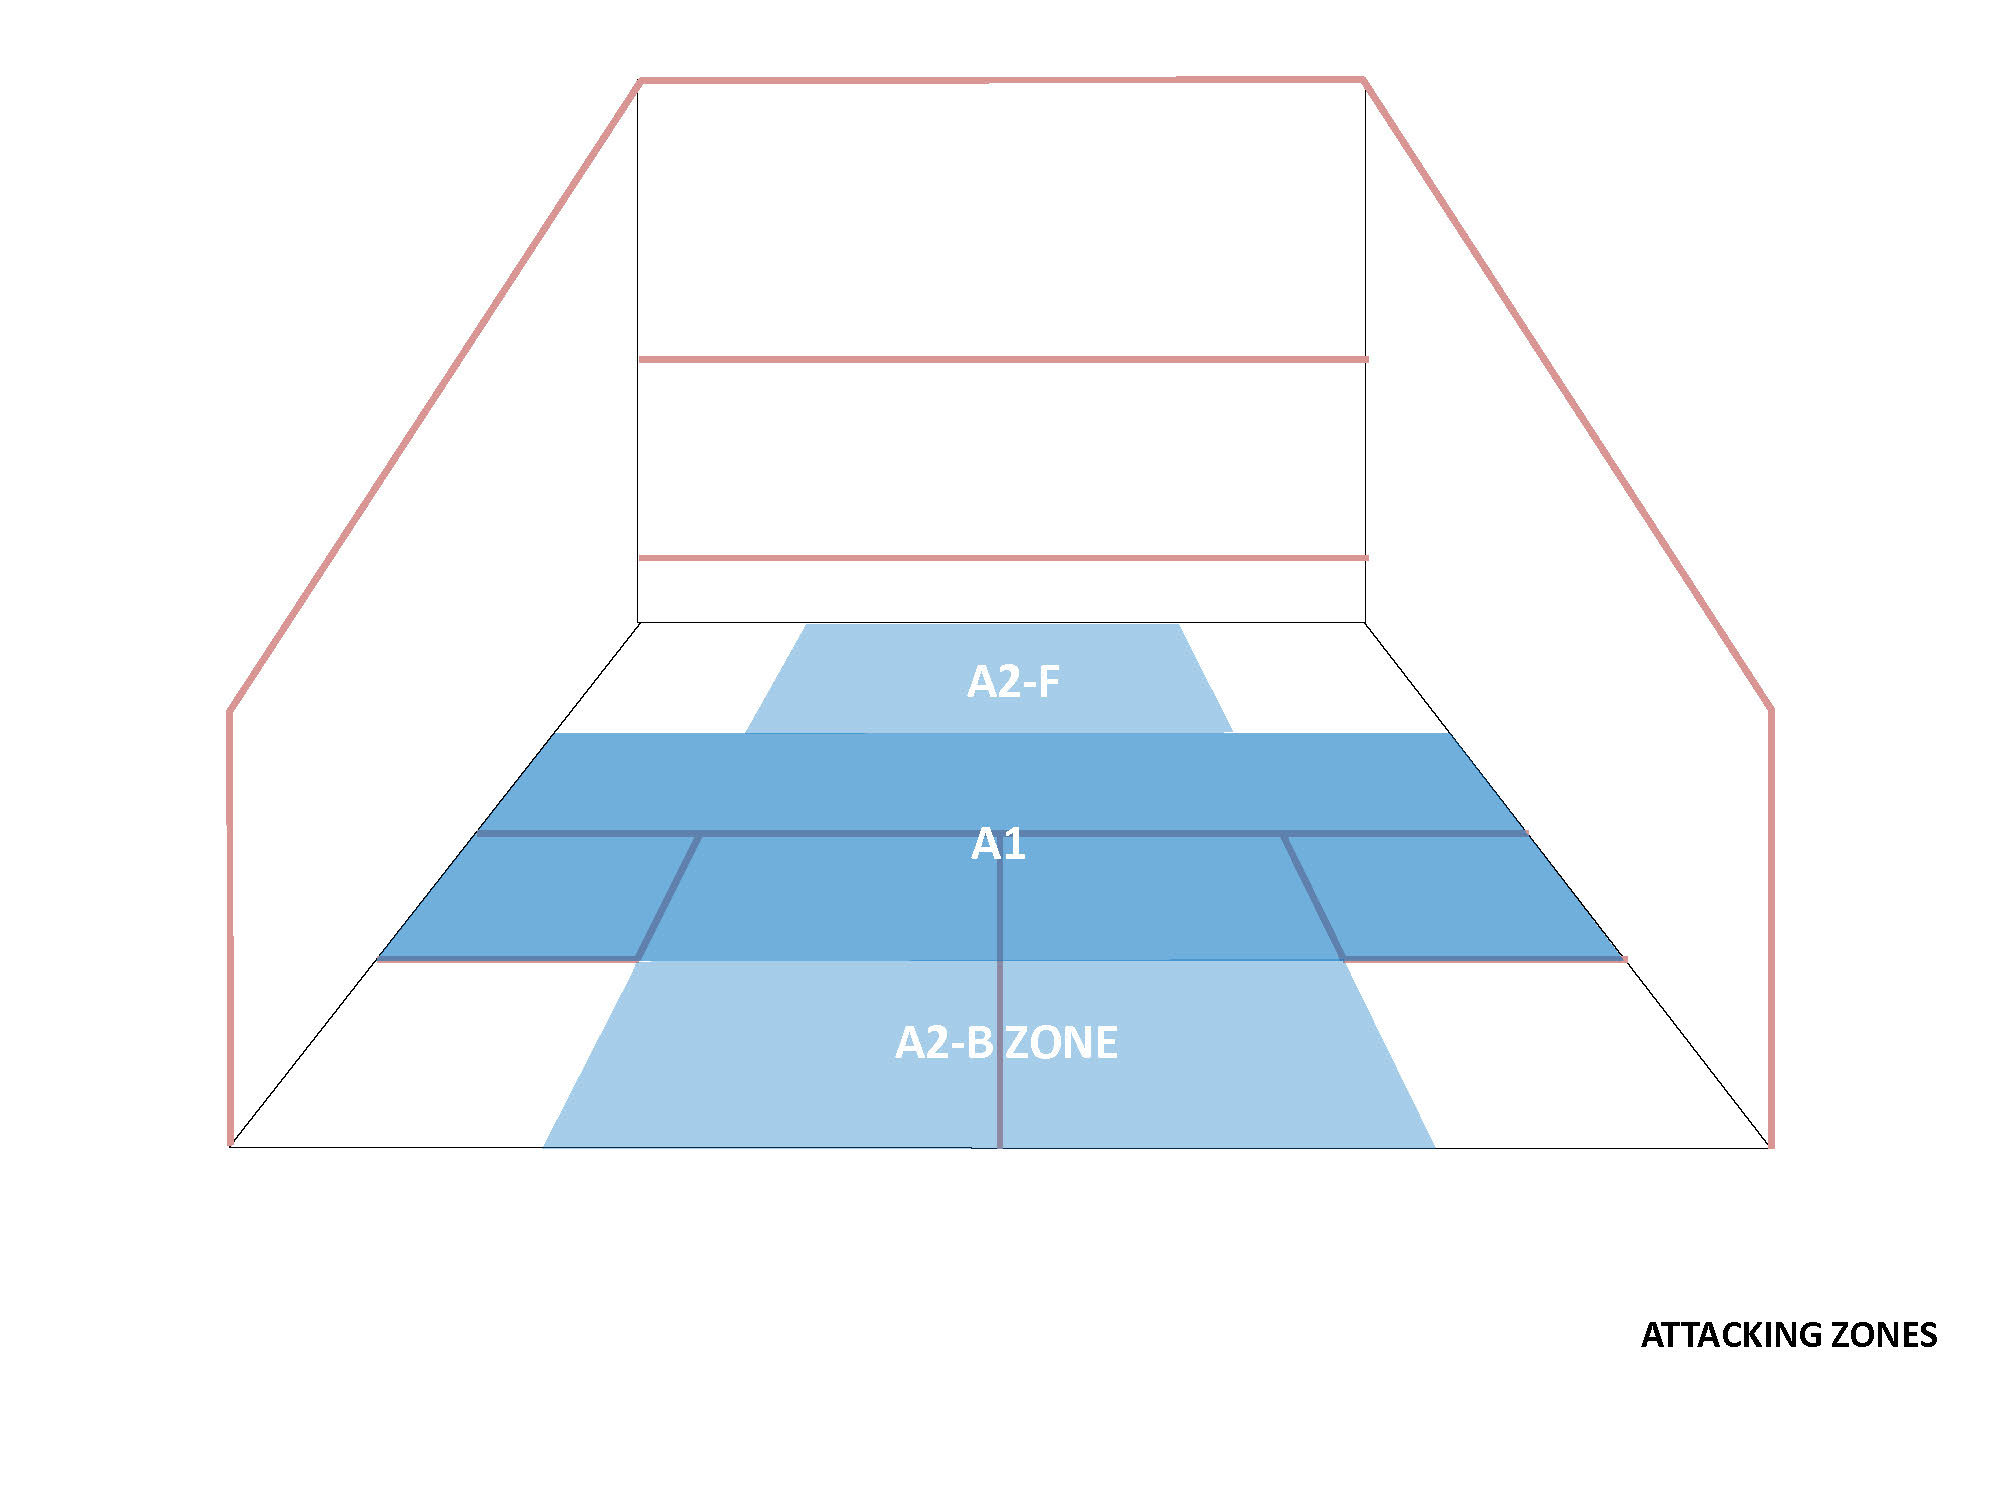
A perspective of the A1-Zone in relation to the other Attacking Zones.
The videos below do not focus on the correct T positioning.
The Zone is Attacking because of the player's proximity in relation to The T and because the player is balanced.
Examination of The Attacking Zone
When the player is in The Attacking Zone and the opponent is behind the player should adopt the natural tactic of playing a drop shot and when the opponent is in front a drive to the back (the furthest point).
The player only requires reasonable quality to attain The T.
Further Examination of The Attacking Zone
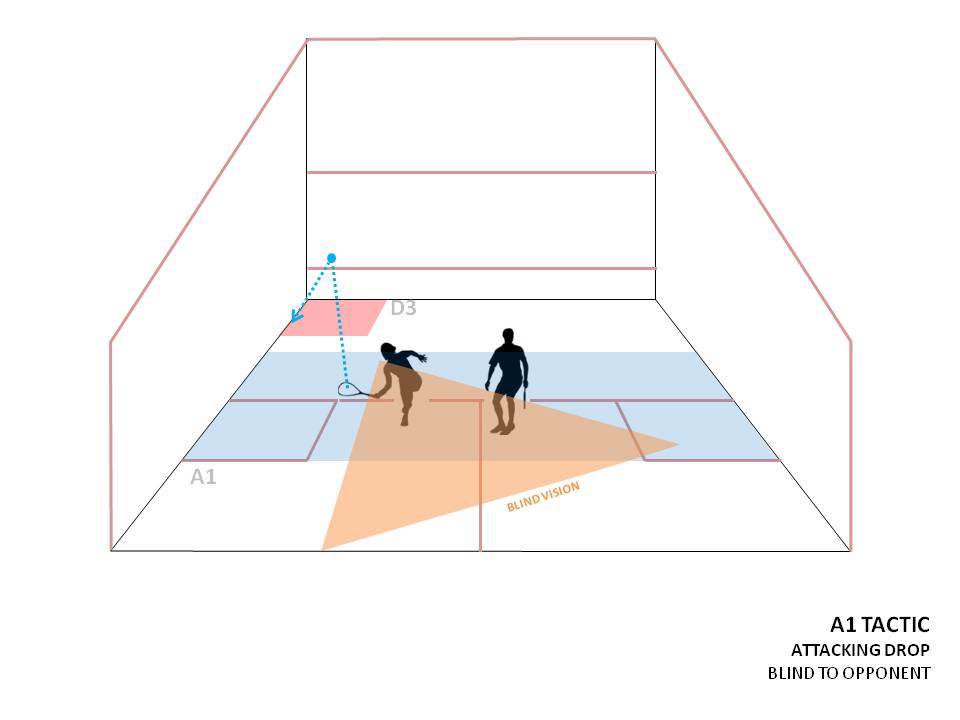
When the player is in The Attacking Zone and the player is blind to the opponent the player should play a straight drop.
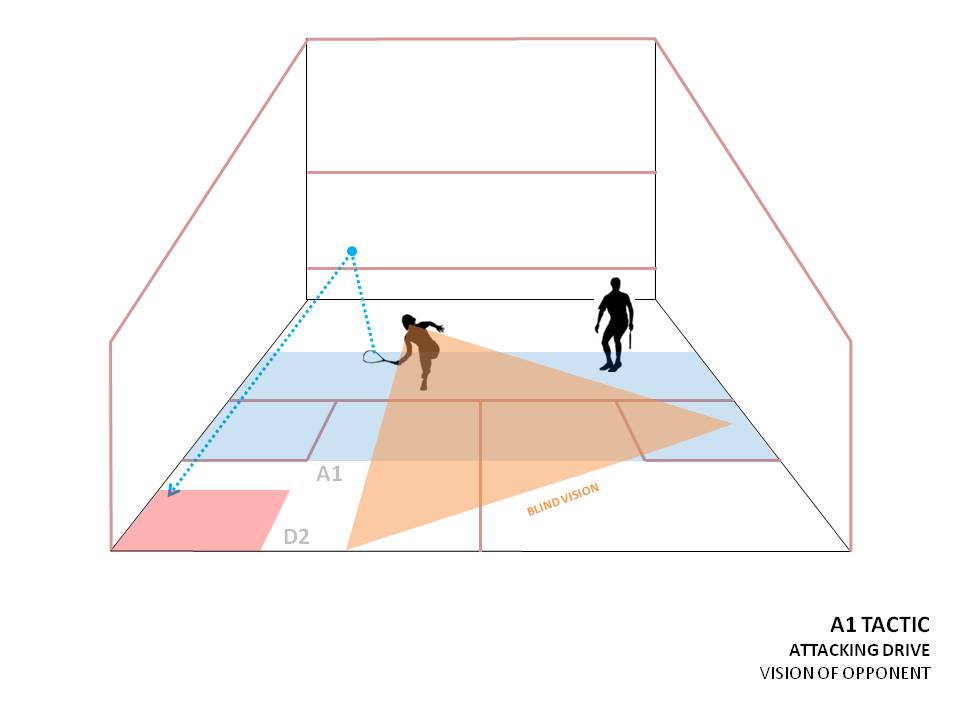
 When the player is in The Attacking Zone and can see the opponent in front the player should play an attacking drive. For example, on this occasion the player can see the opponent on the right side and plays a straight drive.
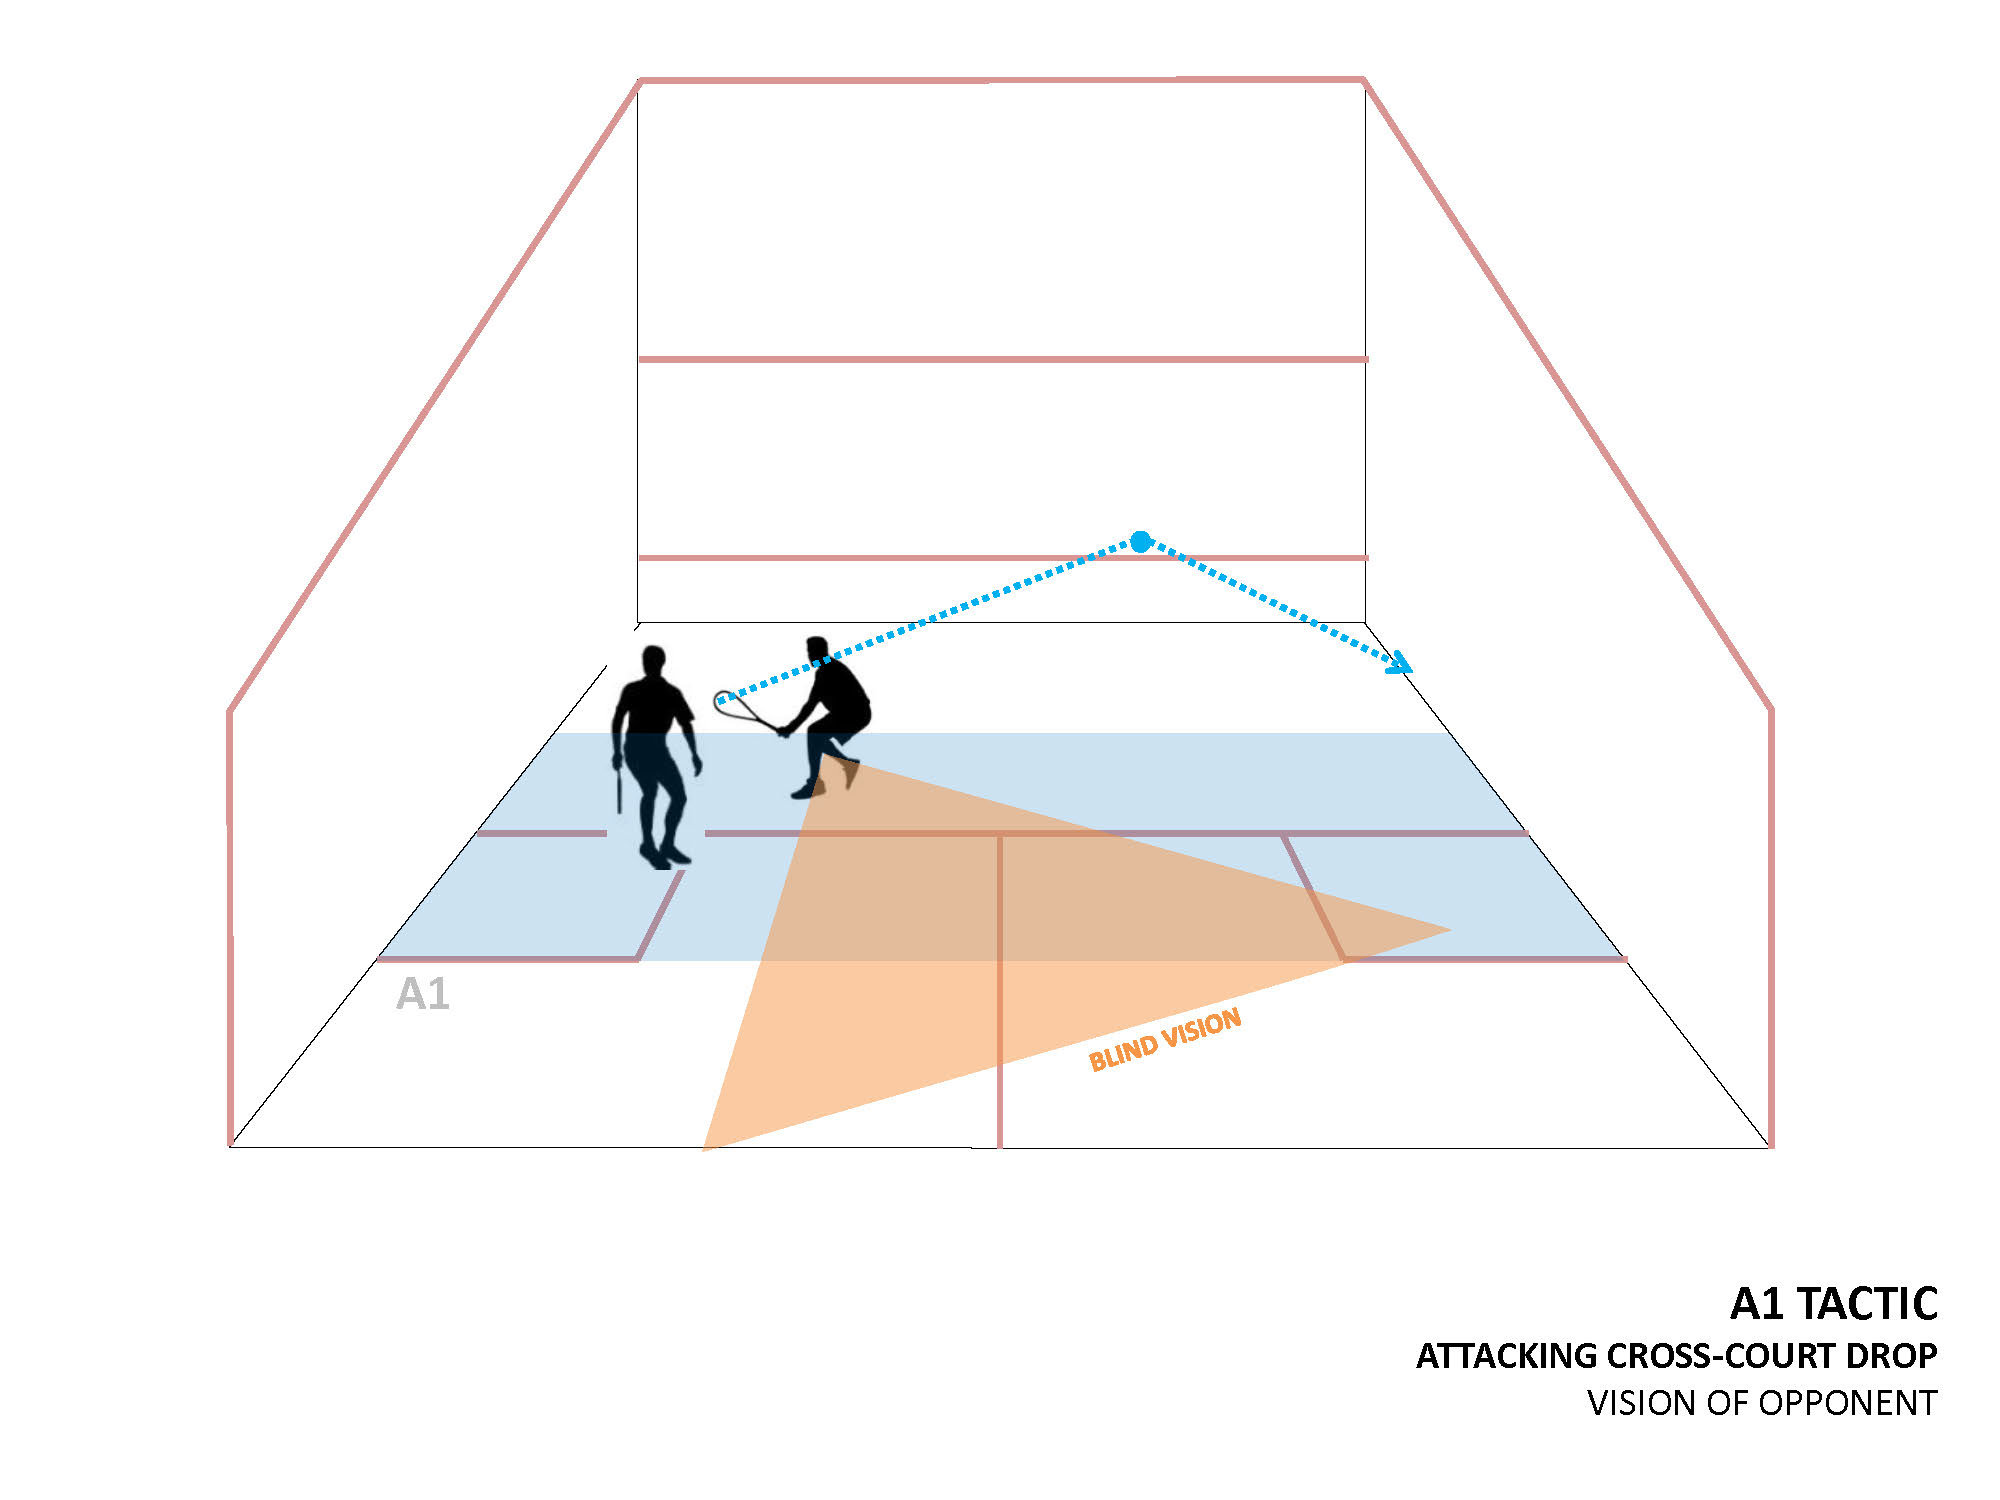
When the player is in The Attacking Zone and can see the opponent shadowing behind the player should play an attacking boast or cross-court drop. For example, on this occasion the player can see the opponent shadowing and plays a boast.
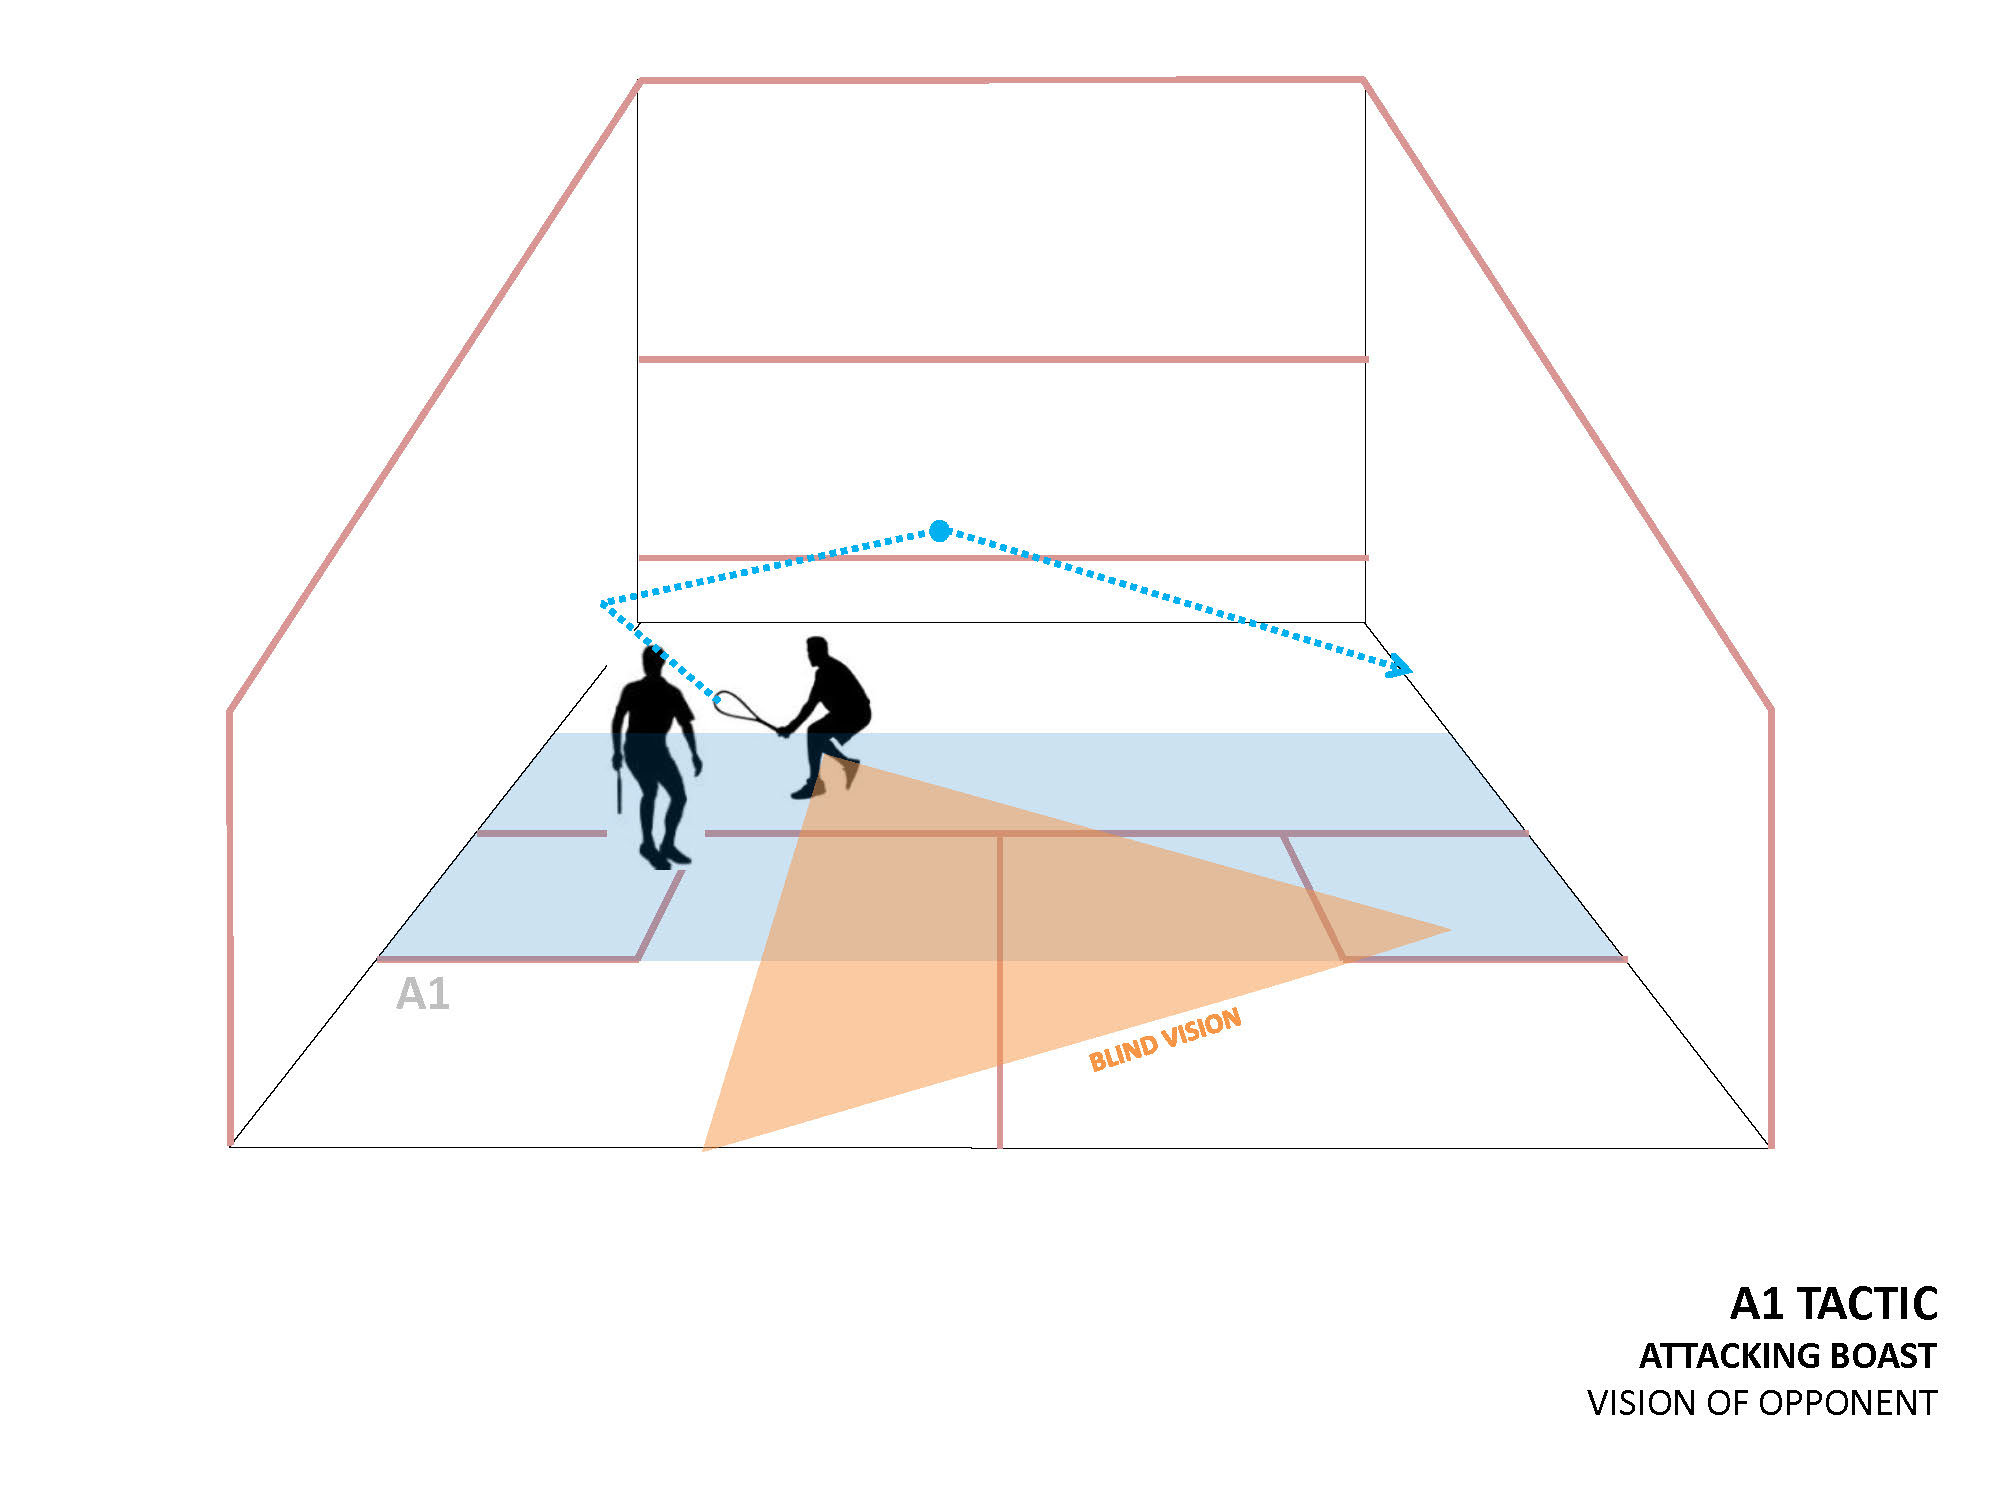
Again the player is in The Attacking Zone and can see the opponent shadowing behind the player should play an attacking boast or cross-court drop. For example, on this occasion the player can see the opponent shadowing and plays a cross-court drop.
When the player is in The Attacking Zone and is blind to the opponent the player should predictably play a straight drop.
When the player is in The Attacking Zone and is not blind to the opponent the player should predictably play a straight drive.
This forces the opponent to work around the player. The player only requires reasonable quality to attain The T.
If the opponent is shadowing from behind and the player is aware, then the player should hit the ball short to the furthest point.
The pros of straight dropping and straight driving (with reasonable quality) from The Attacking Zone.
When player plays a drop with reasonable quality the player should attain The T while putting the opponent under pressure.
When driving the ball with poor quality the player may still attain The T and retrieve the ball.
When driving the ball with reasonable quality the player not only attains The T but the opponent may not retrieve the ball.
The cons of straight dropping and straight driving (with reasonable quality) from The Attacking Zone.
The straight drop or drive often causes interference.
Occasionally, the player may make an unforced error.
More pros and cons of predictability from The Attacking Zone
The pros. Being predictable can encourage the opponent to over anticipate.
The cons. Being predictable can assist the opponent to anticipate.
The player is not balanced
When the player is in The Attacking Zone and not balanced the player should adopt the natural tactic of playing a lob shot either straight or cross court. For example, the player straight lobs.
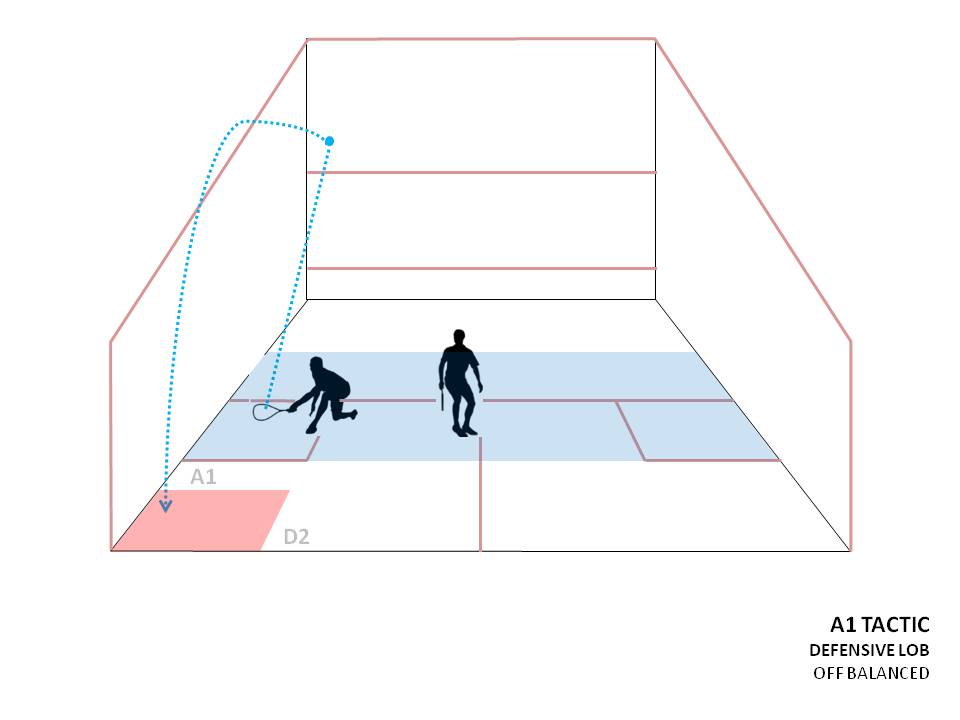
When the player is in The Attacking Zone and not balanced the player should adopt the natural tactic of playing a lob shot either straight or cross court. For example, the player cross-court lobs.
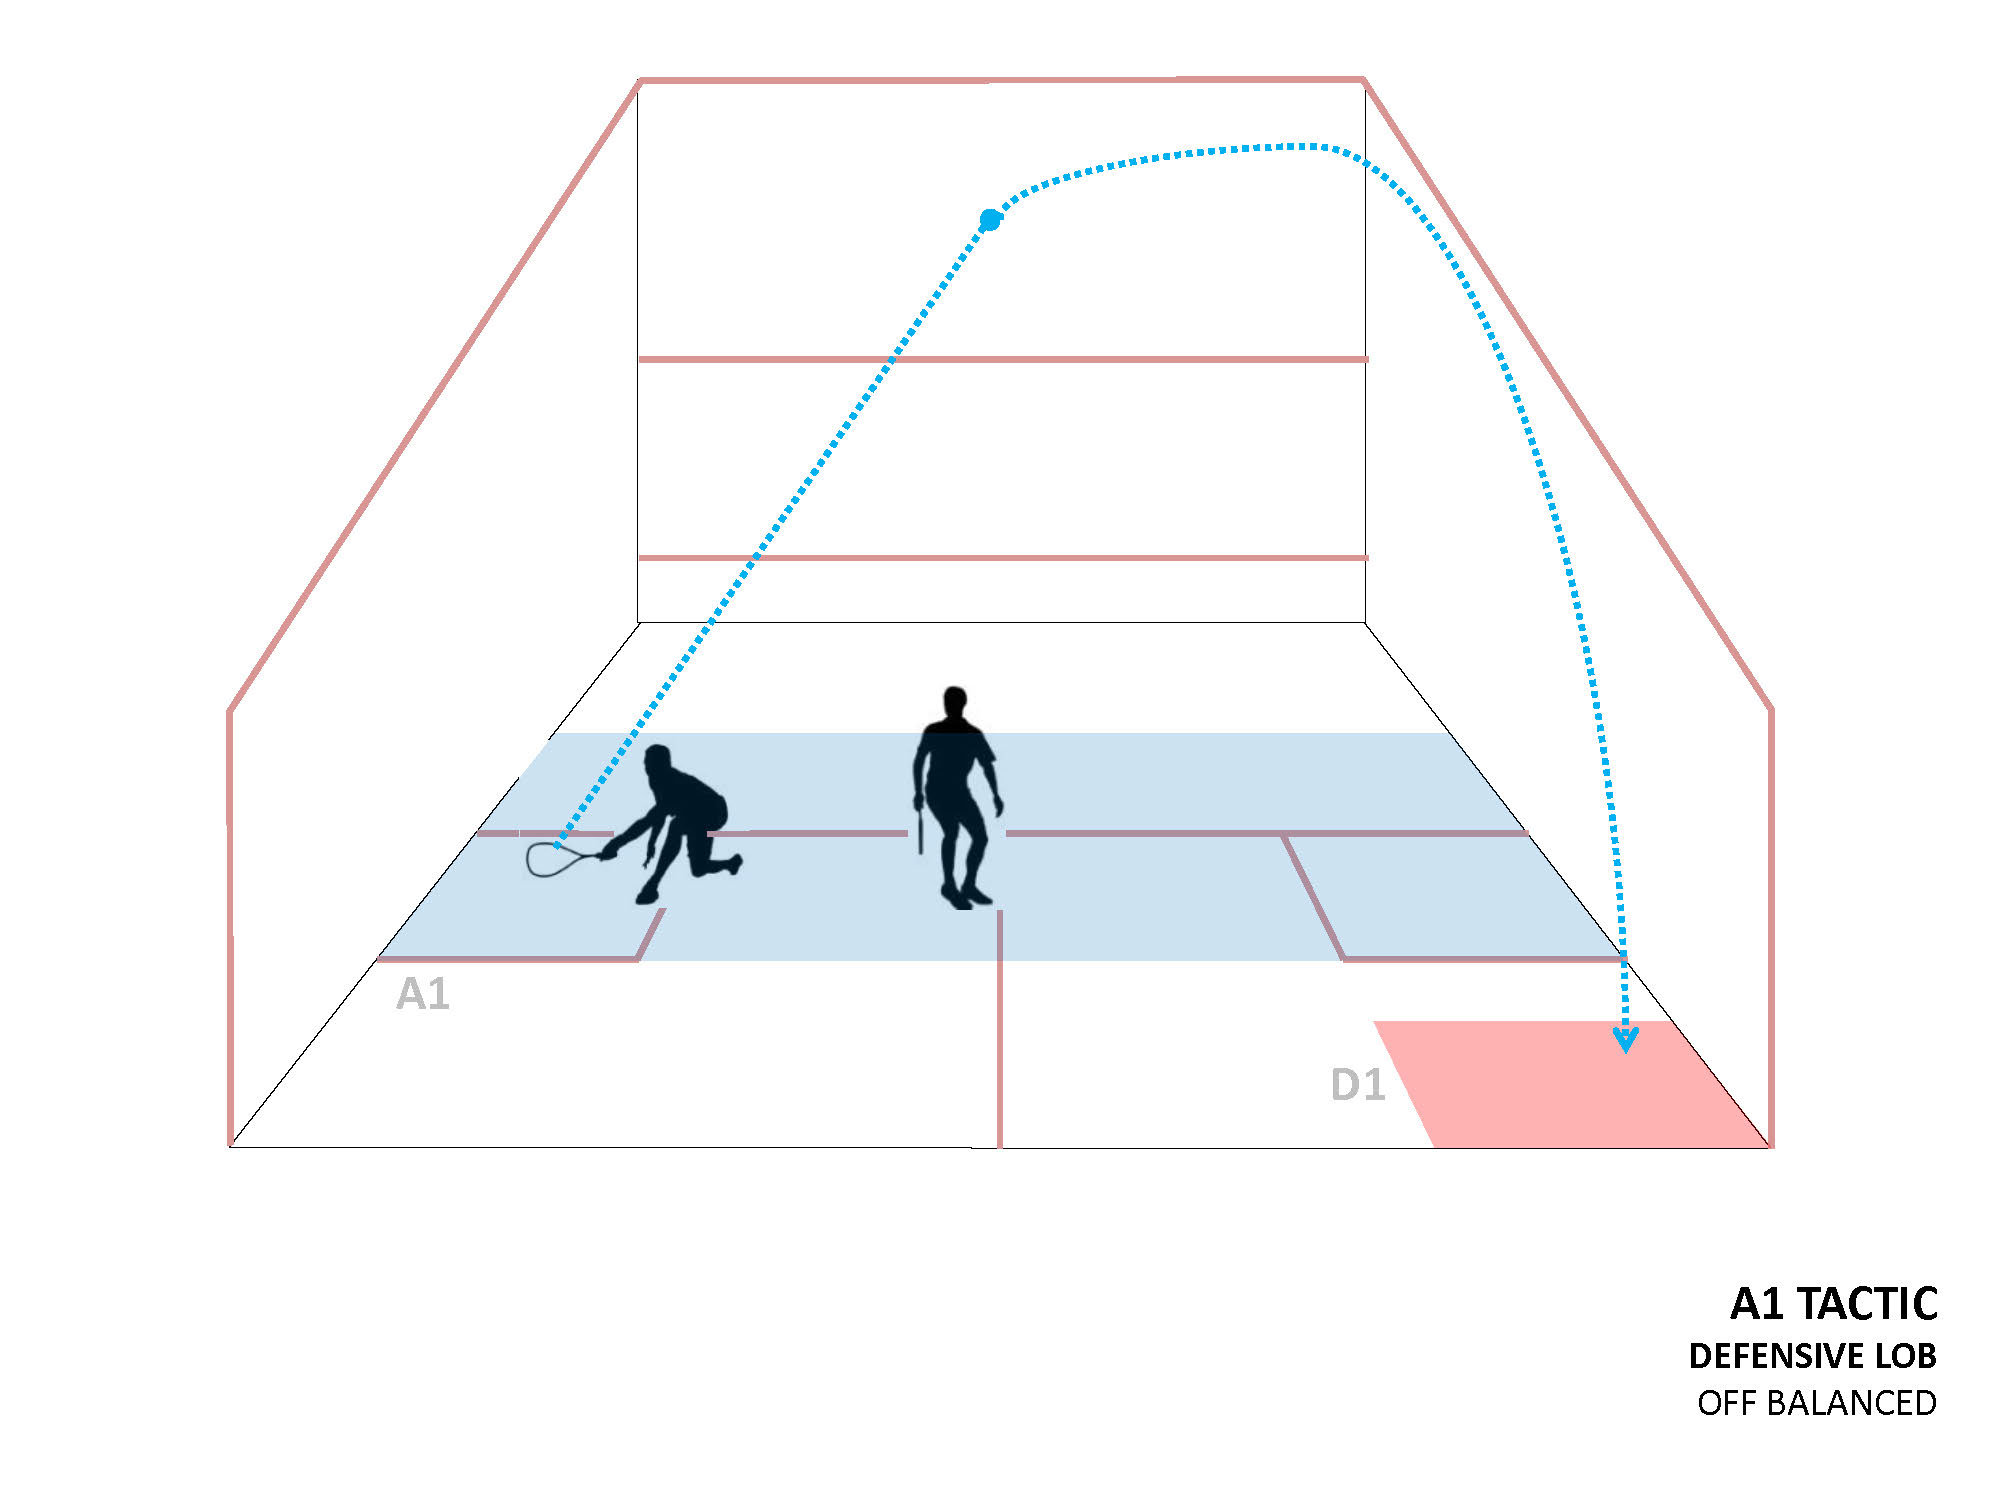
When the player is in The Attacking Zone and not balanced the player should adopt the natural tactic of playing a lob shot.
The player only requires reasonable quality to prevent an error and attain The T.
The pros and cons of lobbing from The Attacking Zone when the player is not balanced.
The Pros.
If the player attacks instead of lobbing when not balanced, this can result in poor quality from the player and as a result the player is unable to retrieve the opponent's return.
If the player attacks instead of lobbing when not balanced the player can make an error.
If the player lobs the player can prevent making an error and attain The T.
The Cons.
When the player lobs the opponent has time to retrieve the ball.
Copyright South Australia Squash Academy Michael Nash All Rights Reserved