


The Defensive Zones D1, D2, D3 and D4
Introduction
Sequencing (Sequentially)
When teaching strategy the author uses the tool Sequencing by sequentially presenting "My Strategy".
Perspective
Firstly, the author believes that attaining The T Area by the time your opponent is about to hit the ball is critical and essential that it only requires reasonable quality. That is, the player does not have to rely on the player's A Game, but the player's B Game will suffice.
Rationale
The player's distance travelled to retrieve the ball is minimised if the player can be within The T Area by the time the opponent is about to hit the ball. Furthermore, the player only needs to hit the ball with reasonable quality.
Goal
To attain The T Area by the time your opponent is about to hit the ball and only require reasonable quality.
Process
The process which achieves the goal of attaining The T by the time the opponent is about to hit the ball is outlined below. This process, except for one scenario, only requires reasonable quality.
The process requires structure and with structure comes predictability. The player needs to learn to embrace the positive aspects of predictability and be aware of the negative.
The author decided that to assist the player to choose whether to attack or defend when attempting to attain The T the player needed to zone the court into defensive and attacking zones. The tool Visualisation is essential in this process.
Defensive Zones - D1, D2, D3 and D4.
The player must zone the court into Defensive Zones.

The D1, D2, D3 and D4 Zones are Defensive because of their proximity in relation to The T
A perspective of The Defensive Zones in relation to the D5 Zone.
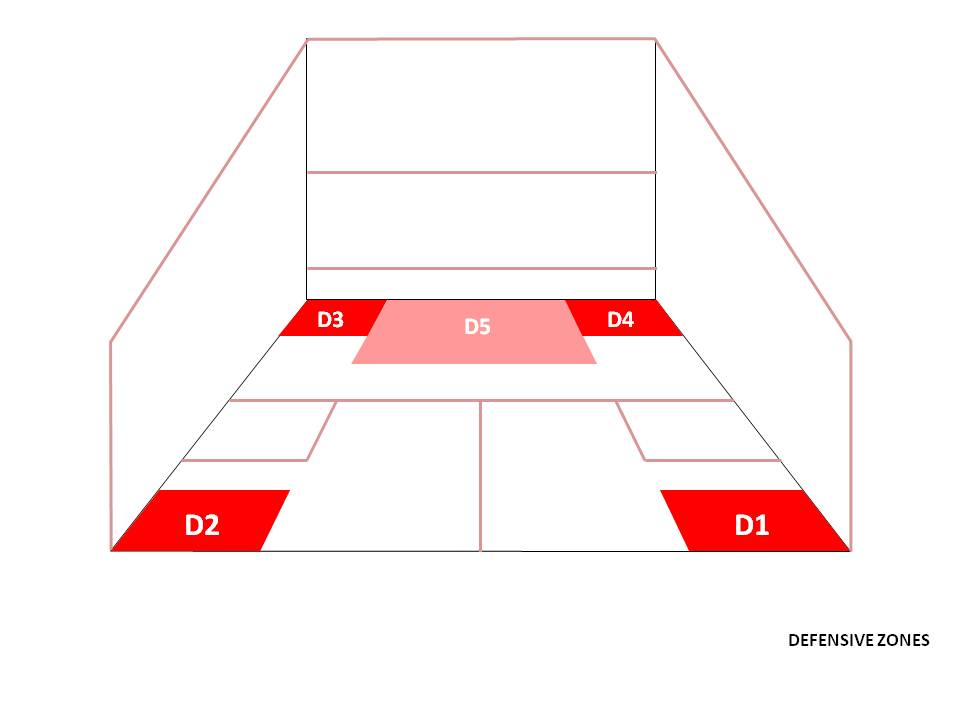
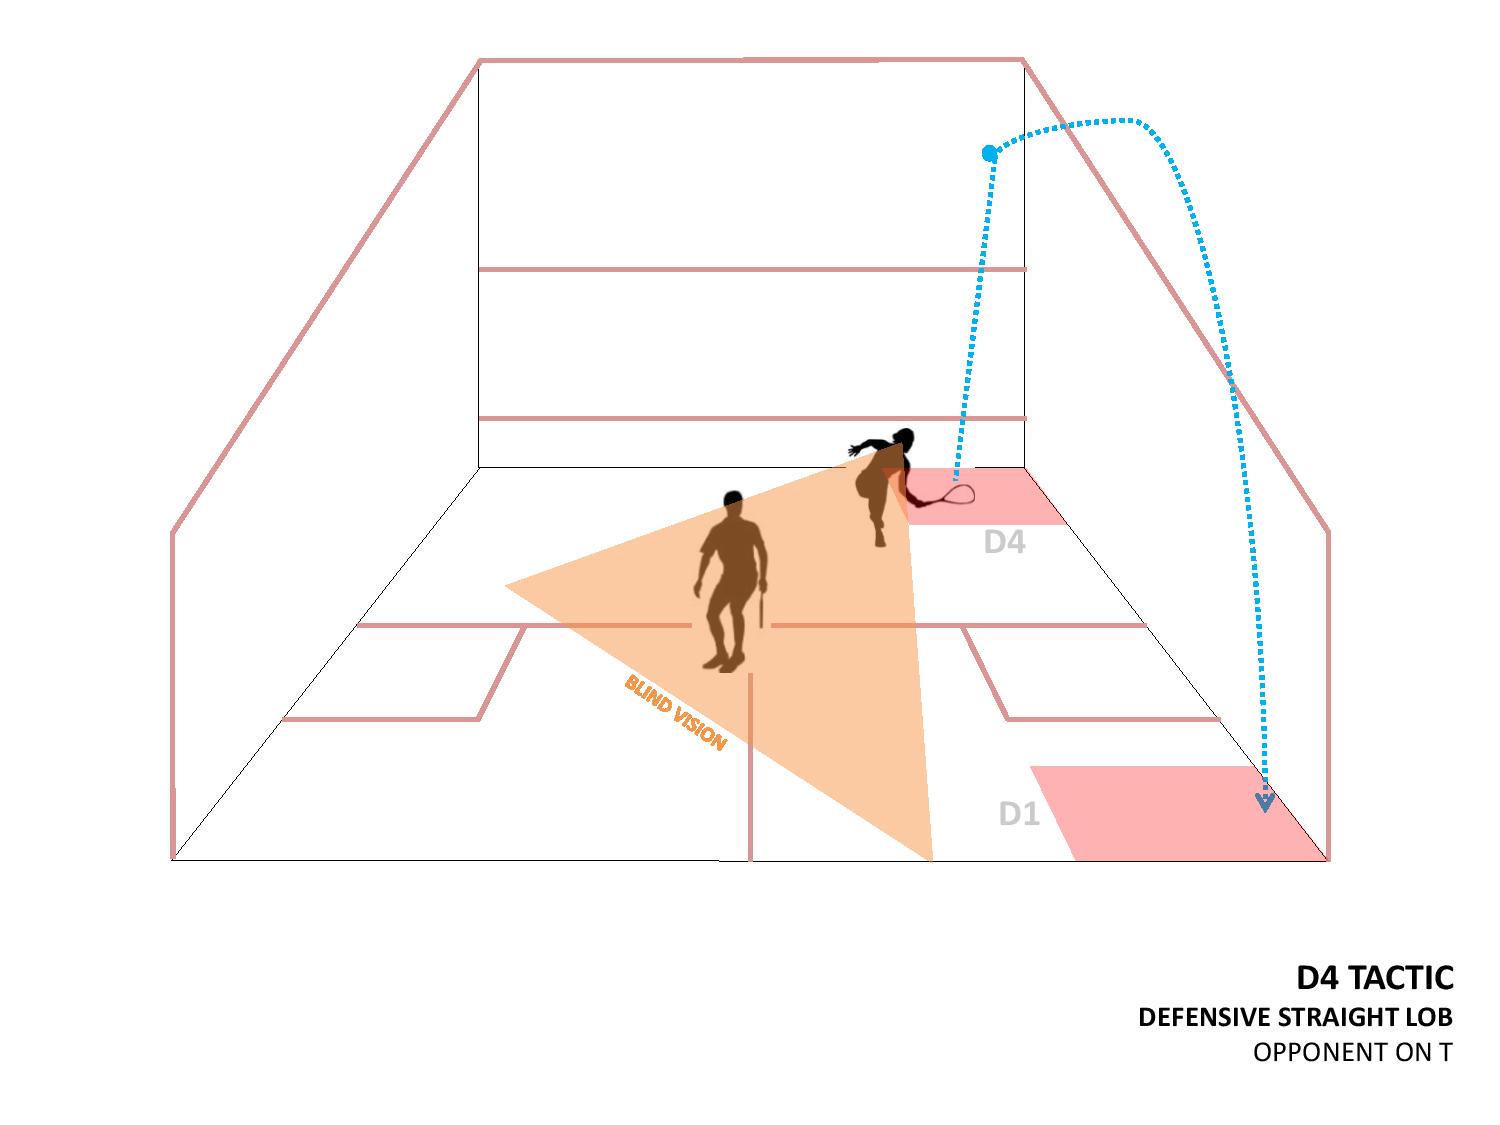
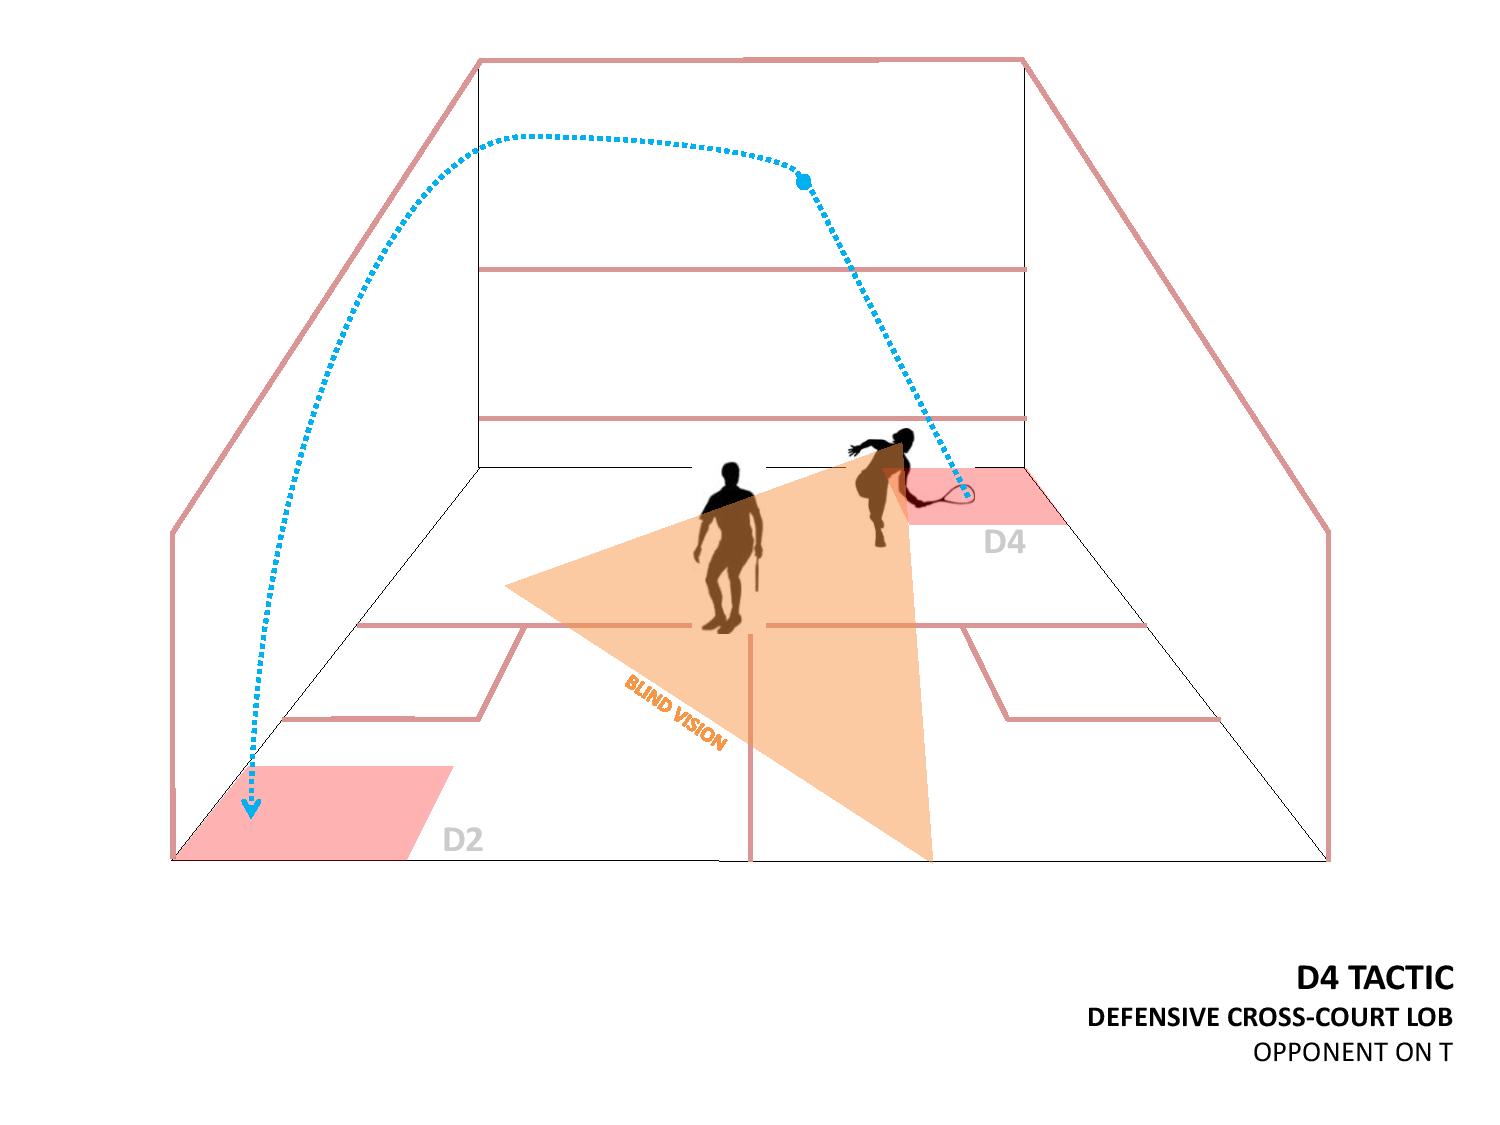
The D1, D2, D3 and D4 Zones are Defensive because of the player's proximity in relation to The T and because the player is blind to the opponent.
The Zones are only Defensive when the opponent is on The T. When blind to the opponent the player assumes the opponent is on The T.
The player when in the back Defensive Zone should adopt the natural tactic of hitting the ball high and slow, either straight or cross court. For example, when the player is in the D2 Zone.


Similarly, the player when in the front Defensive Zone should adopt the natural tactic of hitting the ball high and slow, either straight or cross court. For example, when the player is in the D4 Zone.
Examination of The Defensive Zones (the videos below do not focus on the correct T positioning)
The player only requires reasonable quality to attain The T.
The pros of lobbing (with reasonable quality) from The Defensive Zones.
The opponent is forced to the back which may result in an unforced error.
The height of the lob may cause the opponent to be off balance which may result in poor quality.
A poor quality lob may allow the player to recover close to The T.
The opponent may be forced to boast which assists the player to react.
A poor quality lob may allow the player to recover to The T.
The cons of lobbing (with reasonable quality) from The Defensive Zones.
When the player lobs the opponent has time to retrieve the ball.
When the player cannot see the opponent shadowing and lobs the player loses an opportunity to attack with a boast or a low and hard cross court drive.
Again, it is apparent that lobbing from The Defensive Zones gives the opponent time to retrieve the ball.
Visit Sub Menu Defensive Zones - Sub Menu - G1, G2, G3 and G3
The D1, D2, D3 and D4 Zones have been extended to include the G1, G2, G3 and G4 Zones. These Zones have been renamed ED1, ED2, ED3 and ED4.
Copyright South Australia Squash Academy Michael Nash All Rights Reserved